Clear Vibrations

Quakertown, PA's Mobile Enhancement Headquarters

550 California Road Suite 7
Quakertown, PA 18951
267-227-3875
  • Home
  • Services
    • Car Audio
    • Custom Installation
    • Driver Safety
    • Fleet Services
    • Remote Car Starters
  • About Us
    • Work for Clear Vibrations
  • Reviews
  • Location
  • Contact Us
  • Facebook
  • Instagram
  • Twitter
  • YouTube

Here’s How Car Audio Amplifier Classes Maximize Efficiency

Amplifier Classes

In the past, we’ve looked at Class AB and Class D amplifier classes, the two most popular configurations in the mobile electronics industry. With that said, a few other classes deserve some explanation, as they can deliver improvements in amplifier efficiency without altering the sound quality. This article will review Class AB and Class D and then talk about G and H designs. We’ll also dispel some myths about device topology and how these amplifiers work.

How Does the Amp Output Stage Work?

Before we talk about output device configurations, we need to explain how the output stage of an amplifier works. When your installer connects a speaker to an amplifier, they expect a voltage proportional to the input signal to be supplied. The amplifier power supply determines the maximum voltage that can be provided to the speaker and the impedance of the speaker determines how much current will flow. Our limits are the voltage of the power supply and its current delivery capabilities.

Almost every amplifier uses what’s known as a Class B output device configuration in car audio systems. This circuit design uses two switching devices (transistors or MOSFETS) to alternate between the amp’s positive and negative voltage supplies. When both are off, no voltage is supplied to the signal. When the positive device is on, a positive voltage is supplied to the speaker, and it moves outward. When the negative device is on, the speaker moves inward. The level of our audio signal determines how “on” each device is. This configuration is often referred to as a push-pull design.

Amplifier Classes
Positive and negative switching devices in an amplifier circuit let us know that it’s configured in a Class B topology.

Class AB Car Audio Amplifiers

A Class AB amplifier is a Class B amp adjusted to make the transition between the positive and negative switching devices smooth and effectively distortion-free. Most amplifiers switch from one device to the other with as little overlap as possible so the amplifier can be as efficient as possible.

A few high-end amplifiers allow both devices to overlap their operation a little more than normal to ensure that the transition is even smoother and less crossover distortion is created. This configuration reduces distortion at the expense of increasing how much current the amp draws. When appropriately executed, the results can be quite astonishing. The ARC Audio SE-Series and D’Amore Engineering A-Series amplifiers are great examples of these high-bias designs.

Amplifier Classes
ARC Audio’s Signature Edition amplifiers feature a high-bias Class AB output configuration that delivers amazing sound quality.

For a more scientific look at how A, B and AB stages are configured, check out this BestCarAudio.com article.

Amplifier Classes
Almost every car audio amplifier uses a Class B output device configuration with fixed power supply rail voltages. The green trace represents the audio signal, the red trace is the positive rail voltage and the black trace is the negative rail voltage.

Class G and Class H Amplifiers

A few companies that truly understand what genuine enthusiasts expect from a high-end car audio amplifier have implemented what are known as Class G and Class H designs. Unlike Class B, G and H don’t refer to an output device configuration at all. G and H are different methods of adjusting the power supply’s output to improve an amplifier’s efficiency. As such, Class G and Class H amplifiers are subsets of a Class B amp.

The power supply may be configured in a Class G amplifier to deliver two more output voltages. The amp operates typically at a lower-than-maximum rail voltage so that less heat is generated in the output devices. When you crank up the music, the amp will dynamically switch the power supply output to a high-voltage mode, so the output signal doesn’t get clipped. Some amps’ switching is based on average power level requirements, and others can change based on the audio signal’s immediate needs. A Class G amplifier’s output devices are configured in a standard Class B topology and, with proper biasing, deliver the same amazing sound quality.

Amplifier Classes
In a Class G amplifier, the power supply voltage increases when the amp needs to deliver extra power.

Class H amplifiers are very similar to Class G, except that the power supply voltage tracks the audio waveform at high output levels. So, rather than low- and high-voltage modes, the voltage is variable. This configuration offers further improvement in amp efficiency of Class G with the same sound quality as B.

Amplifier Classes
In a Class H amplifier, the power supply voltage can track the audio voltage above a certain level for excellent efficiency. The amp still uses a Class B output device topology.

Class D Amplifiers Deliver Efficiency

A Class D amplifier still uses the same Class B output device configuration, with separate positive and negative switching devices. Where it differs is in how the devices are driven. The analog audio waveform is processed by a controller IC into a series of pulses with different widths. The pulses switch the positive or negative output devices all the way on or off very quickly. A large filter network between the output devices and the speaker smooths these pulses to recreate the original analog waveform.

The efficiency benefit comes from the output devices acting as switches rather than resistors. With little time being partially on or off, very little heat is generated.

Modern Class D driver ICs operate at impressively high frequencies. Some run as fast as 600 kHz, so delivering good high-frequency audio performance is less of an issue than for amplifiers designed a few decades ago. These same ICs include low-voltage operation features to help amplifiers work in vehicles with stop-start electrical systems.

Amplifier Classes
Full-range Class D amplifiers like the UP 7DSP from Match will function at supply voltages under 6V for a second or two so they don’t cut out in vehicles with stop-start ignition systems.

It’s All About Amplifier Efficiency

These days, installers want the smallest and most efficient amplifiers they can find. These criteria make installations more manageable. For those who are genuinely passionate about their listening experience, the larger amplifiers with Class AB output stages still deliver the best performance. If you’re shopping for an amplifier for your car audio system, drop by your local specialty mobile enhancement retailer and ask them about the amplifier classes they offer. Based on your vehicle, power needs and performance expectations, they’ll help you choose a solution that will ensure that the music you listen to sounds great!

This article is written and produced by the team at www.BestCarAudio.com. Reproduction or use of any kind is prohibited without the express written permission of 1sixty8 media.

This article is written and produced by the team at www.BestCarAudio.com. Reproduction or use of any kind is prohibited without the express written permission of 1sixty8 media.

Filed Under: ARTICLES, Car Audio, RESOURCE LIBRARY

Control Your Vehicle Remotely with Your Smartphone

Smartphone Remote

Using a smartphone app to control your remote start or car alarm system is nothing new. Technologies like Drone from Firstech have been around for several years. As with any technology, manufacturers are always working on new features that improve existing platforms’ usefulness or are developing alternative solutions. In this article, the BestCarAudio.com team will look at how smartphone remote control options have advanced over the years.

Lightning-Fast Response Times

One of the most significant changes to systems such as Drone has been the implementation of LTE connectivity. LTE, which unceremoniously stands for Long-Term Evolution, offers a boost in data transmission rate over the traditional 3G communication standard that’s been around since 2003. Not only is the maximum speed much faster, but the latency or delay time is reduced.

What does this improvement in speed mean to someone with a Drone X1-LTE or X1-MAX interface in their vehicle? Commands from your phone are relayed to your vehicle four to ten times faster than with 3G systems. Unlocking your car with Drone is just about as fast as using a one-button RF remote. The speed is absolutely amazing, considering that the message from your phone has to travel through the internet to the Drone servers at Amazon Web Services (AWS), be authenticated, then forwarded to the cellular network for transmission to your vehicle.

More Than Just a Remote Control

Drone does a lot more than just let your phone mimic the buttons on a wireless remote. The system lets you monitor battery voltage, so you’ll know if there’s something wrong before you get to your vehicle and are stranded with a dead battery. Likewise, you can check the temperature inside your vehicle from the app to let you decide if you need to remote start the vehicle five minutes before leaving work, or just a minute.

Smartphone Remote
Knowing whether the interior of your car or truck is hot or cold makes it easy to decide when to use your remote start system.

If you have opted for one of the GPS-activated Premium or Ultimate packages, the system will provide maintenance reminders based on the distance you’ve driven. These can help you plan when you need an oil change based on actual vehicle use. If you are managing a fleet of vehicles, this is a godsend!

The system can also communicate with the engine management system to monitor diagnostic trouble codes. If the Check Engine light pops up, you’ll get a message on your phone. In some cases, these warnings are related to something simple like a loose gas cap. In some cases, these warnings indicate that something is wrong with the vehicle and that it needs immediate service. Again, this might be information that your staff doesn’t always remember to share with you as a fleet owner.

Smartphone Remote
Real-time tracking of vehicle use lets you know when it’s time for regular maintenance.

Bluetooth Vehicle Control Options

If you want effectively unlimited range, then a cellular-based smartphone remote control option is the only choice. With that said, what if your phone could connect to your vehicle directly using technology like Bluetooth? A product called CarLink (in the US) or SmartControl (in Canada) may be exactly what you are looking for, and more!

This remote control package includes a one-button remotes that provide two-way communication with a range of up to 1.5 miles or 2.4 kilometers. The antenna and remotes work with most name-brand remote starter and security systems on the market, including Compustar, Viper, iDatastart, CodeAlarm, Omega, Pursuit and many more.

Smartphone Remote
The CarLink ASCLBTLR system includes a rechargeable one-button remote and an antenna, both of which include a Bluetooth transceiver to work with your smartphone.

Here’s where your phone comes into play. With the CarLink/SmartControl app installed on your phone, you have the option of connecting directly to the antenna in your vehicle using Bluetooth. You can lock, unlock, arm/disarm or remote start your vehicle with a tap on the screen. You can also monitor battery voltage and remaining remote start runtime, and if your starter system includes a thermistor, you can see the temperature in the vehicle. Pretty neat, isn’t it?

Well, wait a second, it gets better. The remotes have Bluetooth transceivers built-in. This connectivity option means that you can connect your smartphone to the remote, then use the radio-frequency (RF) communication to talk to your vehicle. Now, your phone has more than a mile of range available, so you can start your car or check to make sure the doors are locked from inside an apartment or building. Best of all, because it’s all RF-based, there are no fees involved to use the service.

Smartphone Remote
The SmartControl RFK-6000 remote kit includes a Bluetooth-equipped windshield antenna and the unique ultra-thin TXBLCC rechargeable remote control with Bluetooth.

Update Your Car Starter or Security System with Smartphone Control

Whether you need unlimited range from a cellular-based smartphone control system or want to be able to use an RF remote with an app, many technologies are available. Drop by your local mobile enhancement retailer today to find out how you can make it easier than ever to start your car or truck using an app on your Android or Apple phone.

This article is written and produced by the team at www.BestCarAudio.com. Reproduction or use of any kind is prohibited without the express written permission of 1sixty8 media.

Filed Under: ARTICLES, Remote Car Starters, RESOURCE LIBRARY

Proper Headlight Aiming Makes Driving Safer at Night

Headlight Aiming

As fall approaches, we find the sun setting hours earlier than it did in the summer. With this increase in darkness, we need to rely on the forward lighting systems in our cars and trucks to keep us safe. In this article, we are going to look at the importance of making sure your headlights are aimed properly. Proper horizontal and vertical adjustments will ensure that you can see far enough down the road to react to obstacles or avoid animals. Of equal importance, aiming your lights so that they aren’t blinding oncoming drivers is crucial to those drivers staying in their lane and not colliding with your vehicle. The science and process are simple, but they’re often overlooked.

Headlights Are an Important Safety System

In addition to your vehicle’s tires and braking system, your headlights are one of the most critical safety systems on your vehicle. If you can’t see far enough down the road when it’s dark, you won’t have time to react to objects in your path. At 60 miles per hour, you and your vehicle are covering 88 feet per second. Given than most humans have a reaction time of about one half of a second, and it takes another half of a second to move your right foot from the gas pedal to the brake, you’ve already traveled 80 feet. Now, consider that the average vehicle requires between 120 and 145 feet to stop from 60 mph, and you’ve likely traveled at least 200 feet.

Most low-beam lighting systems provide useful output to a range of 100 feet. Some of the better HID and LED systems are bright enough to illuminate 150 feet in low-beam mode. Driving at a speed where you don’t have enough time to stop because of your lighting system’s limits is called overdriving your headlights.

Headlight Aiming
Even factory-installed lighting systems need to be checked regularly to ensure that they’re providing adequate performance.

How Can You Upgrade Your Lighting System?

Upgrading the lighting on your vehicle involves two factors. First, you need a light source that is bright enough to illuminate the road at a distance that gives you enough time to react safely. Next, your lights need to be aimed perfectly to make use of their output capabilities. If your lights are aimed down at an angle of five degrees, then the area in front of your vehicle might be bright, but you’ll never see more than 100 feet down the road. Conversely, having your lights aimed horizontally might provide good long-distance vision, but this can lead to your lights blinding oncoming drivers. A driver approaching you who cannot see the edges of the road or your vehicle is as dangerous as you not seeing where you are going. Proper headlight aiming is paramount!

Headlight Aiming
High-performance LED bulb upgrades like the Intense Series from ODX can provide three times as much light output as a conventional Halogen headlight bulb.

When Should I Have My Headlight Aim Checked?

The first sign that your lighting system needs adjustment would be that oncoming drivers are flashing their high beams at you as they approach. Blinding an oncoming driver is extremely dangerous. Likewise, if your lights don’t light up the rear bumper of a vehicle a car’s length in front of you, they need adjustment.

If you have made any modifications to your vehicle, you should have your technician check the headlight alignment. Changes to tire diameter or suspension height, especially if you have installed a leveling kit or lowering springs, require that the lights be adjusted. If you have added weight to your vehicle in the form of a stereo upgrade with a subwoofer system, the additional mass in the rear of the vehicle may also necessitate a change in light aiming.

Let’s Talk About Headlight Aiming Angle

The farther your lights are above the road, the steeper they can be angled downwards while still allowing you to see approximately 150 feet in front of the vehicle. Many websites cite a specific angle that is deemed to be suitable for all applications. The reality is, the specific downward angle of the beam depends on their distance above the ground. If someone says two degrees is the right angle, but your lights are 18 inches off the ground, you’ll only have light for 43 feet in front of your car. If you have a truck with the lights 36 inches above the ground and set the lights to the same angle, you’ll have light for 86 feet. Likewise, the suggestion that a fixed amount of drop is suitable also fails to compensate for differences in bulb height off the ground.

Have Your Headlights Adjusted for Maximum Safety

When it’s time to have your headlights adjusted, we’ve developed a simple process that makes the adjustment reliable and efficient. Before the technician begins any work, your vehicle must be on level ground with the tires inflated properly. Ideally, whatever combination of driver and passenger(s) is most common to the vehicle’s operation should be inside. Likewise, the fuel tank should be half full. If you have a truck or SUV and carry tools or supplies, have them in the vehicle. You’ll want the ride height to be typical before the measurements begin.

Step 1 – Measure the Cut-off Height

The first step is to establish the level at which the light is produced at the bulb or lens. With the vehicle appropriately loaded (as outlined above), measure from the ground to the top of the light cut-off pattern as close as possible to the headlight lens. Note this measurement for each side of the vehicle, as it may not sit perfectly parallel to the ground.

This process requires that the lights are already aimed relatively accurately. If you’ve had new projectors or bulbs installed, your tech will need to make sure the light pattern is relatively close to accurate. If a light is pointing at the sky, the remainder of the measurements will be inaccurate. They should be within a few degrees of horizontal.

Headlight Aiming
This photo shows a typical beam pattern for a modern headlight system.

Step 2 – Measure the Cut-off at 25 feet

The next step is to measure the height of that headlight cut-off at a distance of 25 feet in front of the lights. Use the same reference point used for the first measurement to set this distance. For example, if the tech measured the at-vehicle height 4 inches in front of the headlight lens, he or she should measure out 24 feet and 4 inches for this second measurement.

Step 3 – Use the Chart

Using the chart below, your technician can determine how high the cut-off should be above the ground for the distance you want to illuminate. If you drive exclusively in the city, then the 125-foot distance will work well. If you drive in the country, the extra distance afforded by using the 175-foot measurement is a better choice.

Headlight Aiming
Using this chart eliminates the need for any calculations and allows your technician to aim your headlights for maximum performance and safety.

Step 4 – Adjust the Lights

Most modern vehicles have simple adjustments for vertical and horizontal alignment built into the light assembly. In most cases, a long screwdriver is all that’s required to raise or lower the light aiming to achieve the correct cut-off height.

Headlight Aiming
With a quick look at a resource like ProDemand, your technician can quickly and easily determine the headlight adjustments for your vehicle.

The next step is for the technician to adjust the lights so that the drop at the 25-foot mark matches the chart. As long as both lights are close to each other in height, your technician can fine-tune the adjustment by lowering whichever light is higher so that the top of the cut-off is in line with the output pattern of the other light.

Horizontal Headlight Adjustment

If work has been done to the vehicle or the light assemblies, then your tech may need to adjust the horizontal adjustment to make sure both lights are aimed forward and that the hot spots from each light are spaced apart by the same distance as the bulbs in the vehicle. It’s crucial to make sure the lights are pointed straight ahead and not off to the left or right.

Drive Safely with Proper Lighting

There are a multitude of options to upgrade the lights in your car or truck. High-performance halogen, LED and HID bulbs can improve the capabilities of mediocre factory lighting systems. Once you’ve had these light upgrades aimed properly, you’ll be able to see farther and drive more safely. Your local specialty mobile enhancement retailer can likely help you with a complete lighting solution that includes proper pattern alignment.

This article is written and produced by the team at www.BestCarAudio.com. Reproduction or use of any kind is prohibited without the express written permission of 1sixty8 media.

Filed Under: ARTICLES, Lighting, RESOURCE LIBRARY

Sound Deadening Strategies Help Create a Quiet Ride

Deadening Strategies

We all know that having sound deadening installed in your car or truck is a great way to improve its comfort while allowing your stereo upgrades to sound better. In this article, we’ll look at some of the strategies for adding sound deadening. We’ll talk about different areas of the vehicle and the benefits associated with treating those surfaces. Based on this, you can decide how to get as much value and performance from a damping material investment.

Why Add Sound Deadening

Sound deadening comes in several solutions. For this article, we will focus on what’s known as constrained-layer damping (CLD). In short, these are sheets of dense butyl rubber that are bonded to a flexible layer of aluminum. The CLD is intended to be applied to your vehicle’s metal panels to add mass and reduce the panels’ ability to vibrate and transmit sound from outside the car or truck to the interior.

Sound deadening can be applied to almost any surface to help prevent noise from the engine, exhaust, transmission, tires or wind from getting into the vehicle.

Some damping materials like SoundShield add a layer of closed-cell foam to the aluminum layer for additional energy absorption. This foam also reduces the chances of wiring harnesses or door actuator rods from rattling and making noise as you drive.

Sound Deadening Car Doors

One of the most dramatic upgrades you can make to your vehicle’s comfort is to have the doors treated with sound deadening. Here, two approaches offer different benefits. The outer door skin, the one you see when you look at your car or truck from outside the vehicle, is a large and relatively flat surface. If you tap on it, you can feel that the metal is somewhat flimsy. Having damping material added to the back of this panel will dramatically reduce noise transfer. Since you sit close to the door, the results are quite noticeable.

Deadening Strategies
Drive Customs in San Luis Obispo, California, added a layer of deadening material to the outer panel of this awesome 1966 Ford F-250 pickup truck.

The second surface that can benefit from deadening is the inner door skin. This is the metal you’d see when the technician working on your car or truck removes the plastic trim panel from the interior side. This is another large surface and is often very flat.

Aside from keeping road noise out of the interior, sealing the door skin can have a dramatic effect on the performance of a door-mounted speaker. Typically, large openings in the metal allow access to the window regulator (the mechanism that raises and lowers the window), the door handle and the latch parts. Left open, the sound coming from the back of the speaker will mix with the sound coming from the front and cancel. Sealing these openings will dramatically improve lower midrange and bass performance from the audio system. This increase in output means your technician can reduce the power sent to the speaker so it will last longer. Likewise, a reduction in how hard a woofer has to work will reduce distortion and improve clarity.

Deadening Strategies
Perfectionist Autosound and Security in Anchorage, Alaska, sealed and damped the inner door skin of this Toyota Tundra pickup truck.

Floor and Firewall Deadening

Modern vehicles are designed using computers to deliver a balance of strength and weight to make the vehicle drive well. Most automakers work hard to save every ounce so that fuel economy is optimized. You’d be surprised how much noise from the engine and transmission comes into the vehicle through the firewall and floor. Of course, the answer is to have these surfaces treated with high-quality deadening material. The process does require some significant work to remove the center console, seats and carpet, but it’s well worth the investment.

Deadening Strategies
Mobile Toys in College Station, Texas, created a custom kick-panel speaker mounting location in the kick panel area of this vehicle. The floor, firewall and speaker mounting surface were all treated with sound deadening material.
Deadening Strategies
Define Concepts in Orange, California, treated the floor of this Mustang known as Disgustang. The upgrades include a custom audio system from David Freiburger of Hot Rod Magazine and Roadkill fame.

Pickup Truck Noise Control

The back wall of a pickup truck is another surface that can transmit a lot of sound energy into a vehicle. Though it’s blocked from wind noise, it still transmits drivetrain, exhaust and tire noise. Treating the back wall is a great way to improve the comfort of these vehicles.

Deadening Strategies
Perfectionist Autosound and Security removed the interior of this Chevy SS pickup truck so that they could thoroughly treat it with sound deadening.

Sound Deaden Your Vehicle’s Roof

Easily the biggest and probably the flattest panel in a vehicle is the roof. Whether you have a short-cab pickup or an SUV with 40 square feet of metal, wind noise will transfer into the vehicle through this flat surface. Having the roof liner removed can take some time, but the effort is worth the expense to improve your vehicle’s background noise level. With microphones for Bluetooth hands-free systems typically installed up high in the car, cutting down on noise will dramatically enhance an outgoing phone call’s clarity.

Deadening Strategies
The team at Andre’s Electronic Experts in Courtenay, British Columbia, treated the roof of this classic Mustang with a layer of sound deadening before the interior went in.

Trunk and Cargo Area Sound Control

If you have a car with a trunk, especially if you are having subwoofers installed there, controlling panel vibration and rattles will make a huge improvement to the performance of your audio system. Likewise, road noise and sound energy from the exhaust system will be reduced by treating the floor, fenders and hatch or trunk lid.

Deadening Strategies
Perfectionist Autosound and Security treated the trunk floor, wheel wells, fenders and trunk lid of this classic Dodge Challenger to a thorough layer of SoundShield sound deadening material.

Picking the Right Deadening Material

As you can see, different areas of the vehicle need to be upgraded for different reasons and with different results. What remains constant, no matter where your technician is working, is the need to use high-quality materials. On surfaces that are vertical or where the deadening will be installed upside-down, proper surface preparation is paramount, and using a product with excellent adhesion qualities is a must. Avoid deadening that is bitumen- or asphalt-based as they can soften and come loose in high-heat conditions.

You’ll want to choose a shop and technician with the experience and training to remove the interior components of your vehicle in a way that prevents any potential damage and ensures that the vehicle can be reassembled properly once the work is complete. The last thing you want is to have clips or brackets that are loose, resulting in more noise added to the interior as you drive.

Having sound deadening installed in your car or truck is one of the best upgrades you can make to the vehicle’s comfort and your audio system’s clarity. Reducing background noise will make the subtleties of your music easier to discern. Likewise, if you have a hands-free Bluetooth system, the outgoing audio quality will be clearer. Drop by your local specialty mobile enhancement retailer today to inquire about having sound deadening installed in your car or truck.

This article is written and produced by the team at www.BestCarAudio.com. Reproduction or use of any kind is prohibited without the express written permission of 1sixty8 media.

Filed Under: ARTICLES, Car Audio, RESOURCE LIBRARY

What Exactly Does Marine-Grade Audio Mean?


Marine Audio

If you’re shopping for audio upgrades for your boat, motorcycle or side-by-side, you’ll often hear the term “marine-grade” thrown around. While the definition depends on the product category and the manufacturer, in most cases that product was designed with enhanced features that will allow it to last longer when used outdoors. In this article, we’ll take a look at some of the standard marine-specific features that let the speakers, amplifiers, source unit and wiring get wet or dirty and continue to function.

Speakers Designed for Outdoor Applications

If you have your local specialty mobile enhancement retailer upgrade the entertainment system in your boat, you’ll want to choose speakers designed specifically for outdoor use. Such companies as JL Audio, Hertz, Clarion, Wet Sounds, Kicker, Rockford Fosgate and many more offer speakers sized from 5.25 through to 8.8 inches in diameter and subwoofers from 8 to 12 inches that use materials that have been chosen to resist the destructive effects of ultraviolet energy from the sun. Likewise, these speakers are typically built around a plastic basket rather than a metal one. They may also incorporate water drainage channels into the grille.

Marine Audio
Speakers such as this Hertz HMX 65 LD/C have been tested to withstand prolonged UV and salt exposure so that they function reliably.

Plastic and rubber designed for outdoor use don’t dry out as quickly as conventional ABS materials. The result is speakers that won’t fade, chalk, crack or turn yellow after only a few months.

When shopping for marine speakers and subwoofers, you’ll want to look for two common test standards. The first is the ASTM-D4329 UV exposure test. Products that have passed this test have been exposed to extremely high ultraviolet radiation levels in a test chamber. To pass the test, the materials can’t suffer from any significant degradation levels, even after 200 hours of exposure.

On a typical sunny day, the sun provides roughly 0.1 to 0.35 watts per square meter. The ASTM-D4329 test can expose products to as much as 6.5 times as much UV energy to accelerate the test process. If materials are going to fail, the intense exposure will make it happen quickly.

Marine Audio
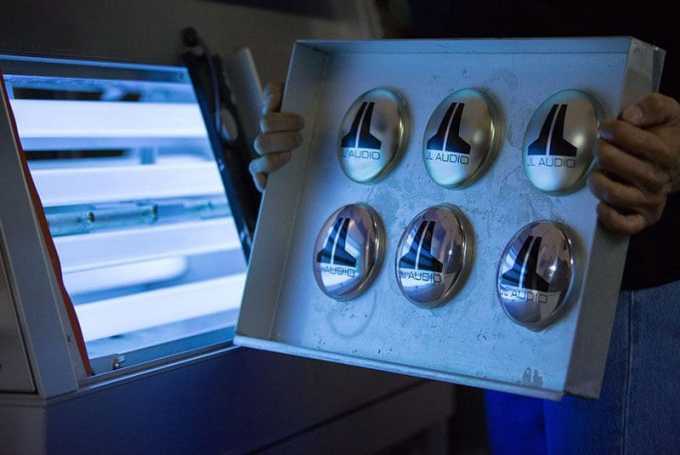
JL Audio tests every component of its marine speakers, subwoofers and wakeboard tower enclosures to ensure that clients will be happy with their purchases.

The second standard you’ll see with respect to speakers and subwoofers is ASTM-B177. This standard is a salt exposure test that ensures that the components used to construct the speaker won’t corrode. Test subjects are placed in a machine that exposes them to a spray or fog of typically 5% sodium chloride (NaCl). This is equivalent to almost twice as much salt as would be found in ocean water. To pass the test, the subjects need to complete it without any signs of corrosion.

Marine-Grade Source Units

Thanks to companies such as Clarion, radios explicitly designed for marine applications are now commonplace. These source options fall into two categories: marine radios and water-resistant marine radios. The marine radios are, for the most part, a car audio unit that has been modified with an upgraded display that’s easier to see in bright sunlight and a corrosion-resistant coating on the main circuit board. Some of these products also add a connection for wired remote controls, and they may include weatherband radio channels as well. More and more marine solutions offer NMEA-2000 interfacing so that they can communicate with multifunction displays from Lowrance, Garmin, Raymarine or Simrad.

Marine Audio
Marine receivers such as the Sony MEX-M72BT feature an anti-corrosive and UV-protectant coating to keep them looking and working great for years in your boat or side-by-side.

The second class of marine source units is those that are designed to be weather-resistant. These products may be based on the same car audio-based circuit board but have a completely new front panel that’s designed to get wet and handle long-term UV exposure. The face of this class of radio should pass the same UV and salt testing as speakers. The front panels, when installed properly, should also have a water ingress IP rating. We’ll explain IP ratings shortly.

In most cases, the main chassis of these radios are not water-resistant. If the face of the radio isn’t sealed perfectly against the mounting surface in the boat, or if water leaks in from another source, the radio can still be damaged. If you are looking for a radio that can stay outdoors in the rain or get splashed by waves when boating, this is the type you want.

What Are IP Water and Dust Ingress Ratings?

IP codes, formally known as Ingress Protection Codes or International Protection Ratings, describe a product’s ability to resist the ingress of solid particles (dust) and liquids (water) under regular use. The letters I and P are typically followed by two numbers that describe the resistance levels.

Marine Audio

Marine Audio

Using the information above, we can see that a product with a rating of IP68 can handle being used underwater for short periods. An iPhone 11 has an IP68 rating. If you’re shopping for a radio for your boat, motorcycle or side-by-side, the front panel will need a suitable IP rating. If you plan on submerging your side-by-side, that’s a whole different ball-game.

It’s also worth noting that a product that passes the IPX7 and IPX8 test may fail the IPX6 test. The specifications may be offered in parallel as IPX6/IPX8 – these are known as dual ratings.

Amplifiers, Fuses and Wiring

Several amplifiers on the market claim to be water-resistant. The JL Audio MX-Series marine amplifiers carry an IPX7 rating, and the Wet Sounds Stealth Micro amp claims a “completely sealed die-cast aluminum chassis for maximum protection against water and dirt intrusion.”

When you’re shopping, be wary of the difference between water-resistant and waterproof. Water-resistant products may only have an IPX rating of 3 where waterproof is likely level 7 or higher. You’ll want to look for amplifiers that have all the wiring entering and exiting the heat sink sealed in a plastic or rubber grommet. A removable panel should protect any controls on the amplifiers with foam or, preferably, a rubber gasket. Take heed: Just because an amp may be classified as waterproof, it doesn’t mean the wiring you’ve used with it will function reliably while submerged.

Marine Audio
WetSounds Stealth Micro amplifiers are a great solution for environments that might get dusty, muddy or wet.

Speaking of wiring, and we definitely should – marine applications can be particularly challenging on speaker wire, power wire and interconnect cables, especially in saltwater conditions. Many wire manufacturers offer tinned copper conductors so that salt won’t cause the copper to corrode quickly.

A bigger concern are fuse holders and circuit breakers used in marine applications. The American Boat and Yacht Council sets the standards for safety in the North American marine industry. They have several requirements for lighting, battery switches, storage batteries, electrical propulsion systems and AC/DC electrical systems on boats. Of particular interest to our discussion is the ABYC E-11.4.15 standard that requires electrical devices that may be operated in an area where fuel or other combustible vapors are present to have an Ignition Protection rating. The test standard for Ignition Protection is SAE J1171. Devices that have passed this test will not ignite combustible gases.

In most cases, these devices are operated in a chamber filled with a highly explosive gas mixture. To pass, the gas must not ignite or explode. It’s our understanding that a spark is created in the test chamber after the standard testing is complete to confirm that the gas mixture was suitably combustible. The device under test may or may not survive this confirmation step.

If you have wiring, batteries or electronics added to an engine compartment or in the same space as fuel storage, all devices must have J1171 Ignition Protection certification.

Marine Audio
Companies such as Stinger offer ignition-protected circuit breakers safe for use in boat engine compartments.

Choose Your Outdoor Audio Upgrades Wisely

If you’re planning to have an audio system installed in a motorcycle, boat, golf cart or side-by-side, spend some time researching the suitability of the products suggested by your local specialty mobile enhancement retailer. Water intrusion protection, UV resistance and much more combine to ensure that your investment in a high-quality entertainment solution will last for many years.

This article is written and produced by the team at www.BestCarAudio.com. Reproduction or use of any kind is prohibited without the express written permission of 1sixty8 media.

Filed Under: ARTICLES, Marine Audio, RESOURCE LIBRARY

  • « Previous Page
  • 1
  • …
  • 35
  • 36
  • 37
  • 38
  • 39
  • …
  • 106
  • Next Page »

Recent Articles

Three tweeters

A Look at the Importance of Tweeter Installation Hardware

July 13, 2025 

High-quality speakers and proper installation are crucial when upgrading your car's audio system. The ease with which your installer can reliably integrate tweeters into your … [Read More...]

Compustar Pro 2WG18 LTE

Product Spotlight: Compustar Pro 2WG18 LTE

July 7, 2025 

At their heart, most remote car starters are the same. When you press a button on a wireless remote, a remote start controller integrated into the vehicle will start the engine. In … [Read More...]

Tools and a subwoofer in the back of a vehicle and it looks like an instillation process is starting

Analyzing Sedan Subwoofer Location Performance

July 6, 2025 

A while back, we looked at how different subwoofer locations affected system performance in a Hyundai Santa Fe SUV. A client of ours asked if that information was relevant to a … [Read More...]

Hertz Capri H100

Product Spotlight: Hertz Capri H100

July 6, 2025 

Though there are dozens, if not hundreds, of marine source unit options on the market, very few are designed with audio performance as their primary consideration. To this end, the … [Read More...]

Rockford Fosgate PMX 5CAN

Product Spotlight: Rockford Fosgate PMX-5CAN

June 30, 2025 

Compared to just over a decade ago, there are dozens of options for marine source units on the market. Few are truly high-end units with state-of-the-art audio performance and … [Read More...]

Customer Reviews

Subscribe to Our Website

Enter your email address to subscribe to our website and receive notifications of new posts by email.

Quakertown Showroom and Installation Facility


Get Directions to Clear Vibrations

Hours

Monday9:00 AM - 5:00 PM
Tuesday9:00 AM - 5:00 PM
Wednesday9:00 AM - 5:00 PM
Thursday9:00 AM - 5:00 PM
Friday9:00 AM - 5:00 PM
SaturdayClosed
SundayClosed

Services

  • Car Audio
  • Custom Installation
  • Fleet Services
  • Driver Safety
  • Remote Car Starters

Connect With Us

  • Facebook
  • Instagram
  • Twitter
  • YouTube

Copyright © 2025 Clear Vibrations · Privacy Policy · Website by 1sixty8 media, inc. · Log in


Loading Comments...