Shopping for a new car, pickup truck or SUV is impossible without being bombarded with information about ADAS technology. Advanced driver assistance systems are designed to help prevent accidents. These can be as simple as backup cameras and parking sensors or as advanced as lane keep assist and forward collision prevention systems. The latter can partially take control of your vehicle to help keep you and the vehicles around you safe.
As we examine the solutions, we’ll highlight those that a competent mobile electronics retailer can add to your vehicle. It would be nice to add all of these, but when the system involves the vehicle’s braking, steering and throttle, aftermarket companies won’t risk potential integration issues.
Blind Spot Monitoring – Available from aftermarket retailers
Blind spot monitoring systems use technology to monitor the area beside and behind your vehicle that isn’t visible in your mirrors or peripheral vision. If you forget to do a shoulder check or your view is blocked, these technologies will help you know when it’s safe to change lanes.
Blind spot monitoring systems are available in passive designs that use cameras on the fenders, mirrors or B-pillars. The image is displayed on a screen in the vehicle when you activate the turn signal. This is a passive system; you must remember to check the camera to know whether it’s safe to move over.
The alternative is an active blind spot monitoring system that uses radar-based ultrasonic sensors in the rear bumpers. These sensors project a field of radar-frequency signals and look for that information to bounce off an object (vehicle) back to the sensor. When these systems detect something, they illuminate an indicator on the dash, the A-pillar or a side-view mirror. If you activate the turn signal while the system has detected a vehicle, an audible warning will be produced so you know not to change lanes.

Rear Cross Traffic Alert – Available from aftermarket retailers
A technology called rear cross traffic alert is often built into radar-based blind spot monitoring systems. This technology uses those same radar-frequency signals but changes the shape of the projection pattern to extend far to the left or right of the vehicle. When you put the transmission in reverse, the sensors activate and warn you if a vehicle or pedestrian is approaching from the side. This is a game-changer for people who don’t back into parking spots in a mall or plaza.

Backup Camera System – Available from aftermarket retailers
Backup camera systems, also known as reverse cameras, rearview monitors or parking cameras, display an image of the area behind your vehicle. They activate automatically when the transmission is in reverse. The image lets you see other vehicles, parking lines, signposts, parking curbs, toys, people and, most importantly, children not visible in the rearview mirrors.
The camera image is usually displayed on a vehicle’s infotainment system. However, rearview mirrors with integrated color displays and stand-alone color screens are also available. Companies like RDV Automotive Technology and ZZ2 offer interfaces that allow an aftermarket mobile electronics retailer to add a camera to an existing infotainment system. These solutions often include dynamic guideline displays that show the predicted vehicle path.
Many parking camera solutions also have an input for a forward-facing camera. If you drive a large vehicle like an SUV or pickup truck, it’s impossible to see short objects directly in front of you. A forward-facing camera is a great solution to prevent accidents while pulling into a parking spot or away from an intersection.

Around View Monitors – Available from aftermarket retailers
Some cars and trucks have cameras placed on all four sides of the vehicle as extensions of the rear and forward-facing camera systems. The images from the four cameras are modified and stitched together to provide what looks like a bird’s-eye view of your vehicle and any obstacles around it. This technology is magnificent when parking and helps prevent scuffs and scratches from curbs or other vehicles.

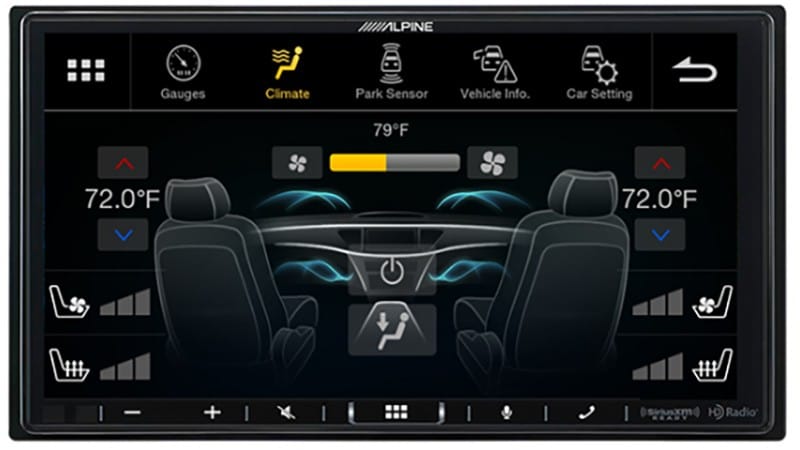
Parking Sensors – Available from aftermarket retailers
Parking sensors are similar to blind spot monitoring systems in that they use ultrasonic transceivers to check the area behind your vehicle for objects or people. Parking sensors are typically mounted in a rear bumper. They will be in combination with either a display in the vehicle or an audible warning system. When backing up, most sensor systems provide the first warning when you are 3 feet away from an object. As you get closer, the display will indicate the distance or the frequency of audible beeps increases. You should be notified within about 12 inches that it’s time to stop.
Some parking systems include additional sensors for the front of the vehicle. These are great for people who park in a garage and need to maintain a certain distance from the front wall.

Tire Pressure Monitoring System – Available from aftermarket retailers
Though not always grouped with typical advanced driver assistance technologies, a tire pressure warning system is very important to the safety of your vehicle and its occupants. These systems measure the pressure in each tire and send that data to a computer in the vehicle. The tire pressure information will be displayed on the dash of most modern vehicles. A warning icon will display if the pressure drops below a preset level.
While current sensing systems typically use a module integrated into the valve stem, some companies are developing sensors built directly into the tire.
While not mandatory, investing in aftermarket sensors is wise if you have a set of snow tires. Monitoring tire pressure helps ensure proper vehicle handling and braking performance.

Lane Departure Warning System – Available from aftermarket retailers
A lane departure warning system uses a specially calibrated camera to monitor your vehicle’s position between the lines on the road or the curb. If it detects you’re drifting across a line, it can sound a warning to let you know. Many factory-installed lane departure warning systems include a small vibrating motor on the steering wheel that functions like a video game controller to warn you when you’re drifting over the road lines.

Lane Keep Assist System – Not available from aftermarket retailers
The next level of lane departure detection is the lane keep assist system. This technology uses the same camera technology as a lane departure warning system but can actively adjust the vehicle steering to bring you back into the center of the lane.

Forward Collision Warning System – Available from aftermarket retailers
Operating similarly to the lane departure warning system, forward collision warning systems may use cameras or radar sensors to monitor the distance between your vehicle and the one in front of it. If this distance decreases suddenly or exceeds a threshold, an audible warning will let you know it’s time to stomp on the brake pedal.

Automatic Emergency Braking – Not available from aftermarket retailers
Just as lane keep assistance is a technology extension of lane departure warning systems, automatic emergency braking is an extension of the forward collision warning system. Using ultrasonic sensors, the vehicle accurately monitors the distance to the next car ahead of it. If the distance shortens quickly or a vehicle is too close, the automatic emergency braking system will apply the brakes for you.
Early versions of this technology were unable to reliably detect pedestrians. The latest versions can, and this advanced technology can eliminate or dramatically reduce the severity of pedestrian collisions.

Intelligent Cruise Control – Not available from aftermarket retailers
Intelligent cruise control systems use the same camera or radar sensors as forward collision warning systems and automatic emergency braking but utilize the data to maintain a specific distance between vehicles when the cruise control system is enabled. In short, you can set the cruise control for the speed limit; your vehicle will slow automatically if you approach a slower-moving vehicle. The ICC system maintains a preset distance between your vehicle and the one ahead, and most can even bring your car to a complete stop.

Door-Opening Warning – Not available from aftermarket retailers
Though the door-opening warning system sounds like the standard chime that lets you know a door is open, it is, in fact, quite different. A door-opening warning alerts the driver to the presence of an oncoming vehicle when their car or truck is stopped. The goal is to prevent you from opening a door and causing a cyclist or driver to swerve out of the way. These systems typically use the blind spot monitoring sensors to detect moving objects.

Driver Monitoring Systems – Available from aftermarket retailers
Using either a camera or a combination of inputs from the vehicle, such as steering angle changes and speed and turn signal use, a driver monitoring system can ensure that the operator is paying attention to the road. Some systems use infrared eye-tracking to make sure the driver does their job accurately.

Automatic Locking Retractor and Emergency Locking Retractor – Not available from aftermarket retailers
An emergency locking retractor allows the seat belt to be pulled freely or for the seat to be adjusted. When there is sudden tension on the seat, the belt will lock in place to keep the occupant secure.
The automatic locking retractor is designed for use with child seats. To activate it, you pull the seat belt out to the end. Next, connect the seat to the latch, then allow the belt to retract. The seatbelt will remain tight until it is unbuckled and allowed to retract all the way.

Rear Automatic Braking – Not available from aftermarket retailers
Rear automatic braking, also called AEB-rear, uses radar-based distance sensors on the back of your car, truck or SUV to monitor fixed objects. If it detects another car, a signpost or a person, the brakes will be applied, and the vehicle will stop.

Electronic Brake Force Distribution – Not available from aftermarket retailers
The maximum traction a tire can produce depends on the contact patch area, the tire compound, the road conditions and the weight applied to the tire. When going around a corner, more weight is applied to the outside tire. Likewise, more weight pushes the front tires into the ground when you apply the brakes firmly. Electronic brake force distribution uses the vehicle’s yaw sensors and accelerometers to apply different braking amounts to each tire. The goal is to minimize the stopping distance without additional input from the driver.

Traffic Sign Recognition – Available from aftermarket retailers
That same little camera that monitors lane markings for lane keep assistance can also look for and read traffic signs. When a speed limit sign is detected, the vehicle may display an icon on the dash to give the driver a reference.

Automatic High Beam Control – Available from aftermarket retailers
If you live in a rural area, you know that turning your high beams off and on when a car is approaching is a constant battle. Vehicles with automatic high beam control use a light sensor or camera to monitor the area in front of the vehicle. When a bright light is detected from an oncoming vehicle, the high beams are deactivated automatically. When the vehicle passes, the high beams turn back on.

Night Vision – Available from aftermarket retailers
Night vision is precisely what it sounds like. Using a thermal imaging camera, a night vision system can display objects on the road ahead of your vehicle in the dash or a secondary display. The system doesn’t emit visible light, yet it can detect objects as far as 1,800 feet in front of your vehicle. Best of all, it can see through rain, fog and snow.

Heads-Up Display – Available from aftermarket retailers
Any technology that helps us keep our eyes on the road can save crucial seconds in an emergency. A heads-up display projects an image of the vehicle’s speed onto a screen or the windshield in front of the driver. Additional information from other advanced driver assistance technologies and navigation or infotainment system information may also be displayed. The goal of a heads-up display is to allow the driver to gather important information while still being able to see what’s happening in front of the vehicle.

The Future of ADAS Is Connectivity
Right now, the cars and trucks on the road don’t know the locations of other vehicles. In short, they can’t predict when one will be in the same place as another until just before it happens. We’re limited to radar- and camera-based technology to make this happen.
The rollout of 5G cellular technology heralds a fundamental improvement in vehicle communication by reducing latency. You may be familiar with latency if you play video games online. In short, it’s the delay between when a message is sent from a source to when it arrives at its destination. Currently, 4G cellular technology has latency of 60 to 100 milliseconds. The new 5G systems can decrease this to under five milliseconds. So, what does this matter? When traveling at 62 mph (100 km), you cover 91 feet (or 27.78 meters) per second. With a latency of 100 milliseconds, you might have moved 9 feet (or just under 3 meters).
If computers in cars and trucks want to predict collisions accurately, they need to know your speed, heading and location. Communication using 5G cellular will permit Vehicle-to-Vehicle and Vehicle-to-Infrastructure information exchange. Imagine if your car could wait an extra second after the light turns green for a car to pass that didn’t notice its red light. Vehicle-to-Person could alert your smartwatch to let you know someone will pull out before you while riding your bicycle.
Whatever the future brings, specialty mobile electronics retailers will continue to offer solutions to upgrade older vehicles. If you want the safest driving experience, drop by a local shop and ask about blind spot monitoring, parking sensors and lane departure warning systems.
This article is written and produced by the team at www.BestCarAudio.com. Reproduction or use of any kind is prohibited without the express written permission of 1sixty8 media.